
How to Put on Bike Grips without Hairspray
Introduction
It’s a common hiccup, but there’s no need for concern. Installing bike grips without hairspray is not just doable it’s also surprisingly simple. I’m here to guide you through every step of this process.
We’ll cover everything from selecting the right alternative to hairspray to the actual fitting of the grips. Plus, I’ll share a list of essential tools to ensure you’re fully equipped for the job.
By the end of this, you’ll have all the knowledge and confidence on how to put on bike grips without hairspray
Understanding Bike Grips
Bike grips are far more than just accessories on your bicycle they are the crucial link between you and your ride. A well-chosen grip provides not only comfort during your journeys but also ensures you have firm control over your bike, enhancing overall safety.
Now, you might wonder why one should consider alternatives to hairspray when it’s such a popular choice for grip installation. The answer lies in the long-term health of your bike grips.
Hairspray, though handy, can sometimes degrade the material of the grips over time or cause them to become slippery in certain conditions. By choosing other methods, you not only avoid these issues but also extend the life and maintain the quality of your grips.
So, let’s learn how you can achieve this, stepping away from the aerosol can, and focusing on techniques that are both safe for your grips and effective.
Tools and Materials Needed
This preparation not only makes the process smoother but also ensures that your bike grips are installed safely and securely. Here’s a list of what you’ll need to begin this straightforward yet important task:
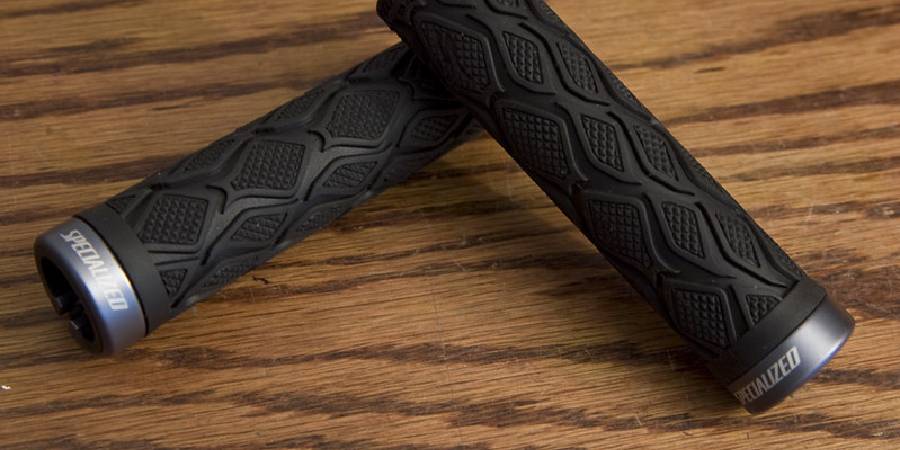
- New grips: Choose grips that are compatible with your bike and comfortable for your riding style.
- Rubbing alcohol or soapy water: These will be used as lubricants, aiding in the easy application of the grips onto the handlebars.
- A small spray bottle: Ideal for evenly applying the rubbing alcohol or soapy water.
- A clean rag: Essential for cleaning the handlebars before installation and for wiping off any excess lubricant afterward.
- A flathead screwdriver or a grip installation tool: These help pry open the grips or slide them onto the handlebars with ease.
Having these items ready will set you up for a successful grip installation, ensuring everything goes smoothly from start to finish. Let’s gather these essentials and move forward with fitting those bike grips!
How to Put on Bike Grips without Hairspray
Fitting new bike grips can seem tricky, especially if you’re used to using hairspray. But there’s a straightforward method that doesn’t require it. Let me guide you through each step to ensure your grips are fitted perfectly without needing any hairspray. Here’s how you can do it:
1. Clean the Handlebars
Begin your grip installation by giving your handlebars a good clean. Grab a clean rag and some rubbing alcohol to thoroughly wipe down the handlebars. This step is crucial as it removes any grease, dirt, or old residue, ensuring that your new grips will adhere properly and securely.

2. Prepare Your Lubricant
Next, you’ll need a lubricant to help slide the new grips onto the handlebars. You can use either soapy water or rubbing alcohol for this. Fill a small spray bottle with your choice of lubricant. Both soapy water and rubbing alcohol are great because they provide enough slip for easy installation but won’t leave a sticky residue.
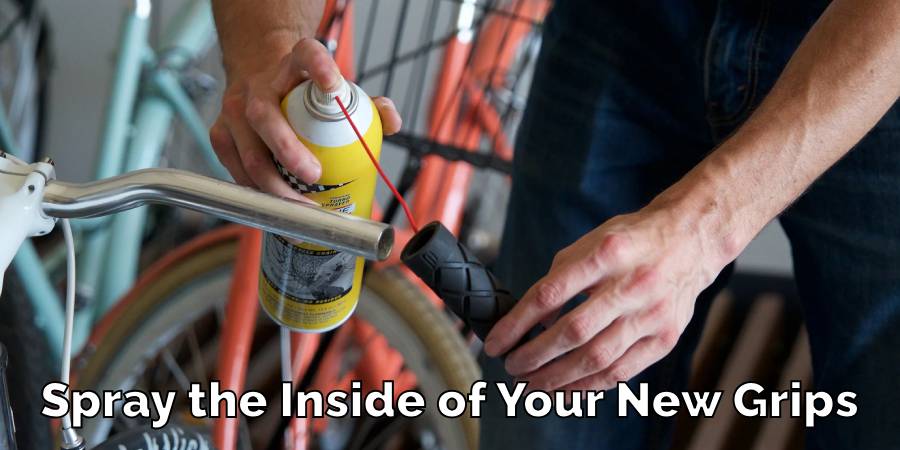
3. Apply Lubricant
Now, lightly spray the inside of your new grips with the lubricant, as well as the area of the handlebars where the grips will go. Don’t overdo it a light coating is all that’s needed to make the grips slide on more easily.
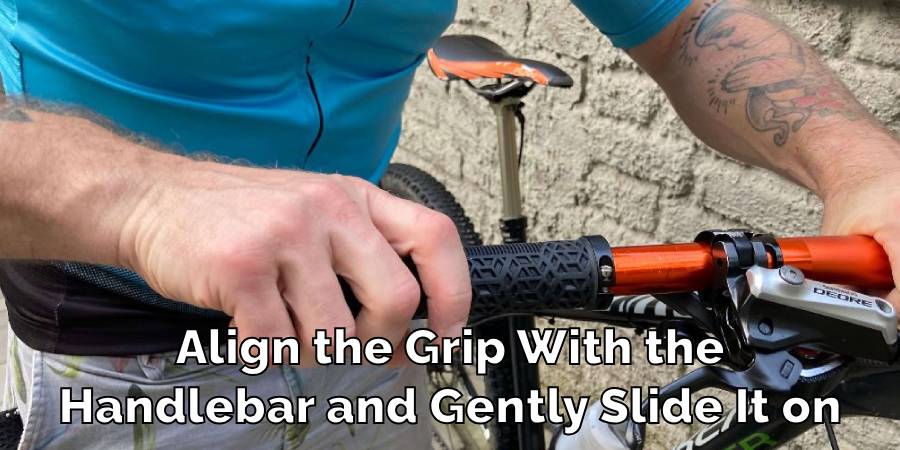
4. Slide on the Grip
Carefully align the grip with the handlebar and gently slide it on. It might require a bit of force, but if it feels too tight, don’t force it – just apply a bit more lubricant. It’s important to be patient and gentle to avoid damaging the grips or handlebars.
5. Adjust for Comfort
Once the grip is in place, take a moment to adjust it to your liking. Make sure it’s positioned for maximum comfort and control before the lubricant dries, as this will be your final placement.
6. Dry Out
The last step is to let the lubricant dry completely, which can take a few hours. During this time, it’s best not to use the bike. This waiting period ensures that the grips are securely attached and won’t move when you’re riding.
By following these steps, you’ll have your bike grips fitted snugly and comfortably in no time. Remember, the key is to be thorough with each step to ensure a safe and enjoyable ride.
Common Challenges and Solutions
When installing bike grips without hairspray, you might come across a few common issues. But don’t worry, each problem has a straightforward solution. Let’s go through them one by one:
Grips Not Sliding On Easily
- If the grips are resisting and not sliding onto the handlebars smoothly, the solution is simple – apply a bit more lubricant. Sometimes, the grips just need that extra bit of help to ease onto the bars.
Grips Too Tight
- In case the grips feel too snug or tight, don’t force them on. Instead, gently pull them back a bit, apply some more lubricant, and try again. Remember, forcing the grips can damage them or the handlebars.
Grips Not Drying Quickly
- If you find that the grips aren’t drying and securing into place, first make sure you haven’t used too much lubricant. If it’s been a reasonable amount of time and they’re still not dry, give it a bit more time. Patience is key here.
Grips Slipping After Installation
- Should the grips begin to slip after you thought they were dry, this might be a sign of residual lubricant inside. Wipe down the handlebars and the inside of the grips to remove excess lubricant, then try reapplying them.
By keeping these solutions in mind, you’ll be well-equipped to handle any small bumps in the road during your grip installation process. Remember, it’s all about taking your time and applying the right techniques to ensure your bike grips are fitted securely and comfortably.
Benefits of Proper Grip Installation
It’s about ensuring they’re fitted in the best way for your riding comfort and safety. Let’s dive into why proper grip installation is so important:
- Enhanced Comfort: Properly installed grips align well with your hands, reducing fatigue and discomfort. This means you can enjoy longer rides without your hands feeling sore or uncomfortable.
- Improved Control: A secure grip allows for better handling and control of your bike. Whether you’re navigating busy streets or tackling rough terrain, having a firm hold on your handlebars makes a big difference in maneuverability.
- Safety Against Slippage: One of the key reasons to ensure your grips are well-fitted is to prevent slippage. Grips that slip during a ride can cause loss of control, which might lead to accidents. Proper installation keeps them firmly in place, giving you peace of mind.
- Better Riding Experience: Overall, when your grips are comfortable and reliable, your entire biking experience improves. You’ll feel more connected to your bike, with each ride feeling smoother and more enjoyable.
- Longevity of the Grips: Correctly installed grips also tend to last longer. They undergo less wear and tear since they’re not constantly shifting or sliding, saving you from frequent replacements.
It’s about ensuring every ride is as comfortable, controlled, and safe as possible. So next time you fit new grips, remember these benefits and enjoy the difference it makes to your biking adventures.
Long-Term Care for Bike Grips
Maintaining your bike grips is just as important as fitting them correctly. Proper care ensures they last longer and continue to provide the comfort and safety you need. Let’s go over some simple yet effective ways to take care of your bike grips for the long haul.
Regularly inspect your grips for any signs of wear and tear. Over time, grips can start to degrade, especially with frequent use. Look for any tears, significant wear, or changes in texture. These are signs that your grips might need replacing.
Cleaning your grips often is another crucial step. Dirt, sweat, and grime can accumulate on them, which not only affects your grip but can also speed up wear. A gentle wipe with a damp cloth or a mild cleaner can keep them in good condition.
Be mindful of the temperatures your bike is exposed to. Extreme heat or cold can affect the material of the grips, causing them to deteriorate faster. Try to store your bike in a temperate, shaded area to prolong the life of the grips.
FAQ’s
What Can I Use to Put Grips on?
When you’re looking to put on bike grips and don’t have hairspray, rubbing alcohol or soapy water are your go-to alternatives. Both are great because they provide enough slip for the grips to slide on easily, but then they dry out, leaving the grips firmly in place.
What is the Best Lubricant for Handlebar Grips?
Among the various options, rubbing alcohol is often preferred. The reason is its quick evaporation rate. Unlike other lubricants that may leave a residue or take longer to dry, rubbing alcohol does its job and then disappears, leaving no slippery aftermath.
What is Grip Glue?
Grip glue is a specialized adhesive designed specifically for securing grips to handlebars. It’s stronger than regular adhesives and is formulated to withstand the wear and tear that bike grips typically endure.
Is It Necessary to Use Grip Glue?
It depends on the fit of your grips. If they slide on and stay snug without any additional help, you might not need grip glue. However, in cases where the grips feel loose or keep sliding, grip glue can be a helpful solution to keep them firmly in place.
What Can You Use Instead of Grip Glue?
If you’re not keen on using grip glue or don’t have it handy, soapy water or rubbing alcohol can be effective alternatives. They provide enough grip for installation and then dry out, helping the grips to stay put.
Conclusion
Fitting your bike grips without resorting to hairspray is not just an easy process, but it’s also a step towards better maintenance and care for your bicycle. The key to success here is a blend of patience and using the right materials.
By following the steps outlined, you’re doing more than just attaching a grip you’re enhancing your bike’s functionality and your comfort. This method ensures that your grips are installed firmly and safely, contributing to a smoother and more enjoyable riding experience.
So, why not give it a shot? Take these tips, apply them to your bike, and notice the positive change in your next ride. It’s a simple change, but one that can make a big difference in how you experience cycling.