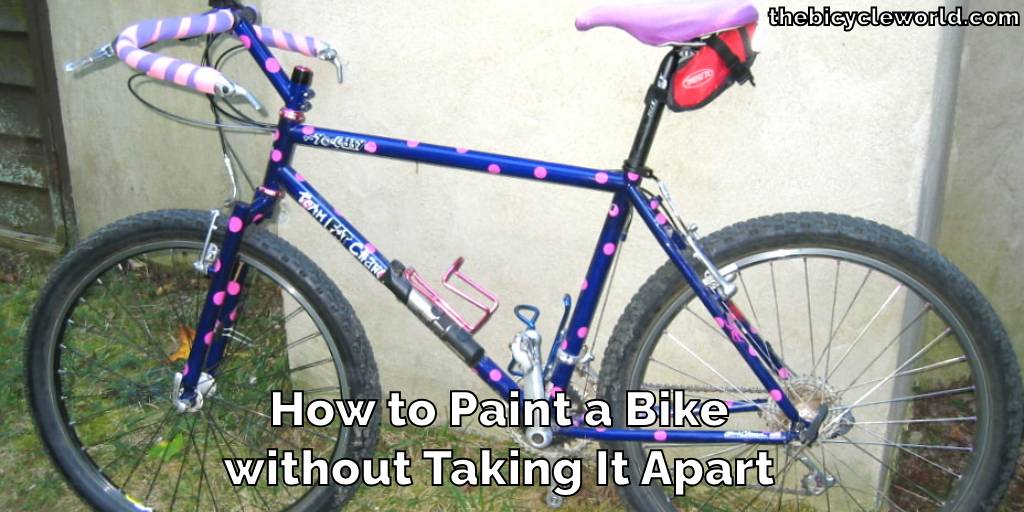
How to Paint a Bike without Taking It Apart
Introduction
Painting a bike can transform its appearance, giving it a fresh, new look. However, the process often seems daunting, especially when it involves disassembling the bike. Fortunately, it’s possible to paint your bike without taking it apart.
This approach not only saves time but also simplifies the task for those who might not be mechanically inclined. In this guide, we’ll look into how to paint a bike without taking it apart, ensuring that you can give your bike a personal touch without the hassle of disassembly.
Why You Need to Paint a Bike without Taking It Apart
Painting a bike without disassembling it offers several advantages. Firstly, it preserves the integrity of the bike’s mechanical components, as frequent disassembly can sometimes lead to wear and tear or reassembly errors.
Additionally, it’s a time-saver for those who want a quick refresh of their bike’s look without the lengthy process of taking apart and reassembling it.

This method is particularly beneficial for casual cyclists or hobbyists who may not have the technical expertise or tools required for a full disassembly.
Moreover, painting your bike while it’s intact ensures that you don’t miss any hidden parts that are only exposed when the bike is taken apart, leading to a more uniform and professional-looking paint job.
Tools We Need to Paint a Bike Without Taking It Apart
Before diving into the painting process, it’s essential to gather the right tools. Having everything you need at hand not only makes the job smoother but also ensures a professional-looking finish. Here’s a breakdown of the tools you’ll need:
- Quality Spray Paint or Brush-On Paint: Choose a paint that’s specifically made for metal surfaces. This ensures better adherence and durability, especially important for a bike that’s exposed to various elements.
- Clear Coat for a Protective Finish: A clear coat is crucial as it seals the paint, providing a protective layer against scratches, weather, and general wear.
- Masking Tape and Covering Materials: Masking tape, along with paper or plastic sheets, is used to cover parts of the bike you don’t want to paint, such as the chain, gears, or seat. This helps in achieving a neat, clean paint job.
- Fine-Grit Sandpaper: This is used for prepping the surface of the bike. Sanding down the frame creates a texture that helps the paint stick better and last longer.
- A Well-Ventilated Space or Paint Booth: Painting should always be done in a well-ventilated area, or even better, in a paint booth. This ensures safety by reducing inhalation of fumes and also helps the paint dry evenly.
- Safety Gear: Safety comes first. Gloves, goggles, and a mask are essential to protect yourself from paint fumes and particles during the painting process.
Having these tools ready streamlines the painting process, making it more efficient and safer. Remember, a good paint job is not just about the painting itself, but also about preparing well and using the right equipment. This approach not only saves time but also ensures a more satisfying and long-lasting result. Now that you’re equipped with the right tools, you’re all set to transform your bike with a new coat of paint!
How to Paint a Bike without Taking It Apart
Painting a bike without disassembling it can be a rewarding DIY project. It’s a straightforward process that involves several important steps to ensure a smooth, even coat of paint. Here’s a detailed guide to help you through each stage:
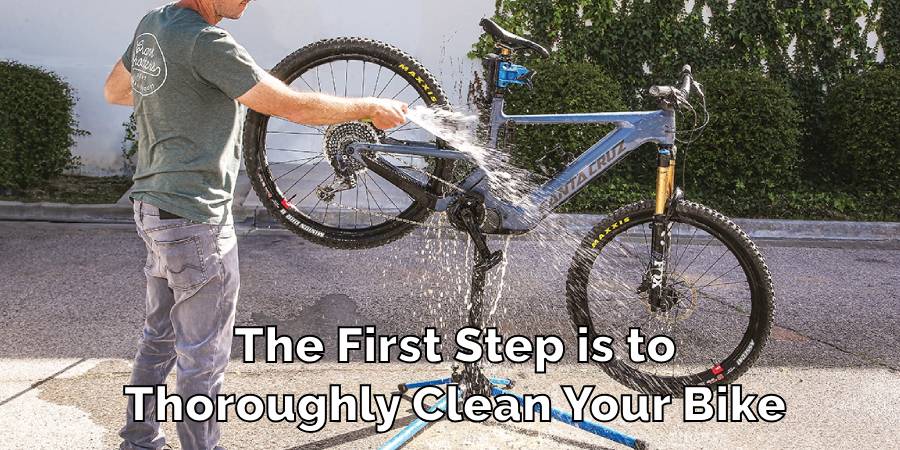
Clean the Bike
The first step is to thoroughly clean your bike. Dirt, grease, and rust can interfere with the paint’s ability to adhere properly to the bike’s surface. Use a degreaser and a rust remover if necessary. Cleaning is crucial as it ensures that the surface is ready for painting.
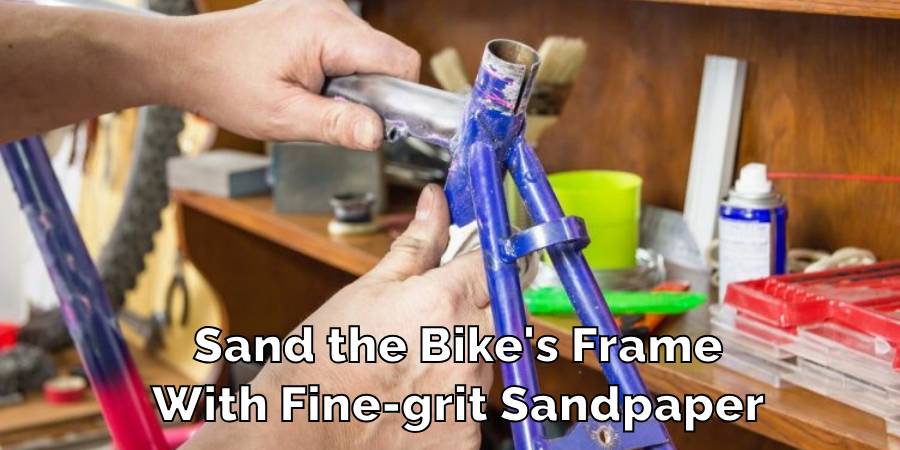
Sand the Surface
After cleaning, the next step is to sand the bike’s frame with fine-grit sandpaper. This task doesn’t require much pressure a light, even sanding is enough. Sanding creates a rough surface which helps the new paint stick better and stay durable over time.
Protect Areas Not Being Painted
This is where your masking tape and cover materials come into play. Carefully cover the parts of the bike that you don’t want to paint, such as the chain, saddle, handlebars, and any other components. This step requires patience and attention to detail to ensure that only the desired areas get painted.
Apply Primer
If you’re using spray paint, it’s advisable to apply a primer first. Primer acts as an undercoat that helps the main paint adhere better and also leads to a more uniform color. Make sure to apply it in a thin, even layer and let it dry completely before proceeding.
Paint the Bike
Now comes the main part – painting. Whether you’re using spray paint or a brush, apply the paint in thin, even coats. Patience is key here rushing can lead to drips or uneven coverage.
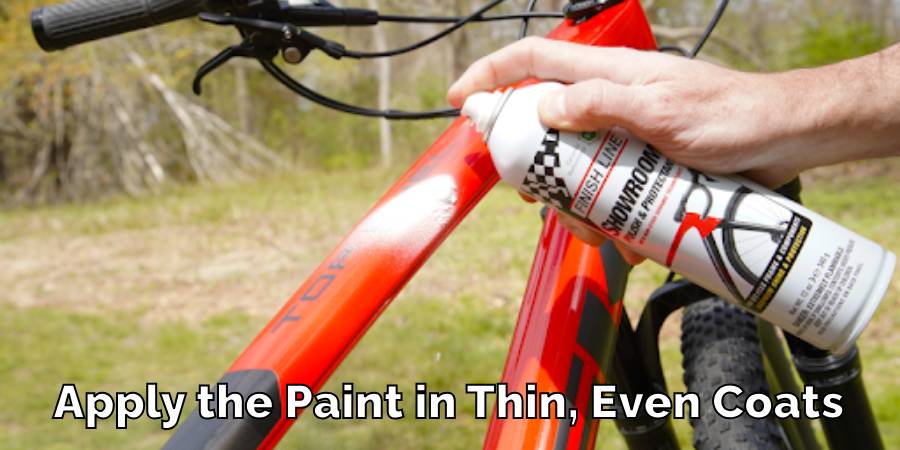
Allow each coat to dry completely before applying the next. This might take several hours, so be prepared for this to be a multi-day project.
Apply Clear Coat
Once you’re satisfied with the paint job and it’s completely dry, apply a clear coat. This clear layer seals the paint, providing a protective barrier against scratches and weather conditions.
It also gives the bike a polished, professional look. As with the paint, apply the clear coat in thin, even layers, allowing each layer to dry thoroughly.
Remove the Protective Coverings
After the clear coat has dried, carefully remove all the masking tape and protective materials. This step reveals your work and should be done gently to avoid peeling any of the new paint.
Final Touches
The last step involves inspecting your bike for any missed spots or areas that might need a touch-up. If you find any, carefully apply extra paint or clear coat as needed.
While simple, requires patience and attention to detail. The result, however, is a beautifully refreshed bike with a personal touch, achieved without the need for complex disassembly.
By following these steps, you can give your bike a new lease of life and a look that reflects your style.
Precaution While Painting a Bike without Taking It Apart
Taking the right precautions is key to ensuring a safe and successful bike painting job. Here are some important guidelines to follow:
Paint in a Well-Ventilated Area or Paint Booth
It’s essential to work in an area with good air circulation. This helps in reducing the inhalation of fumes from the paint and clear coat, which can be harmful. If you have access to a paint booth, it’s the ideal place to paint as it is designed for such tasks and often has better ventilation.
Wear Protective Gear
Safety should always be a priority. Wear gloves, safety goggles, and a mask to protect your skin, eyes, and lungs from paint particles and fumes. This is especially important if you are using spray paint, as it can easily become airborne.
Choose the Right
Paint and Clear Coat: Make sure the paint and clear coat you select are suitable for metal surfaces and are rated for outdoor use. Bike frames are exposed to various elements and conditions, so the paint needs to be durable and able to withstand these factors.
Avoid Painting in Humid or Cold Conditions
The weather can greatly affect the painting process. High humidity can prolong the drying time of the paint and clear coat, while cold temperatures can cause the paint to dry unevenly or crack. Aim for a warm, dry day or an environment where you can control the temperature and humidity.
Check for Compatibility with Bike Materials
Some bikes have frames made from materials like carbon fiber or specialized alloys. Ensure that the paint and primer you’re using are compatible with these materials to avoid any chemical reactions or damage to the frame.
Test Paint and Techniques First
If you’re unsure about the paint or your painting technique, test it on a small, inconspicuous area of the bike or a similar material. This helps you get a feel for the paint and see how it looks when dry.
Keep a Steady Hand and Be Patient
Rushing the painting process can lead to drips, uneven coats, and a less-than-satisfactory finish. Take your time, especially when applying tape to protect areas you don’t want to be painted. A steady, patient approach will yield the best results.
By following these precautions, you can paint your bike safely and effectively without taking it apart. This approach not only saves time but also ensures that you achieve a professional-looking finish, all while keeping yourself and your bike in good condition.
FAQ’s
What Kind of Paint Do You Use on a Bike?
The best choice is a paint designed for metal surfaces. Automotive spray paint is often recommended because of its durability and the smooth finish it provides.
This type of paint is made to withstand the elements and resist chipping, which is essential for a bike that is frequently used outdoors.
Can You Paint a Bike Without Removing Old Paint?
Yes, it’s possible. However, it’s important to sand down the old paint until the surface is smooth. This ensures the new paint adheres properly and gives a more professional finish.
Make sure to remove any flaking paint and smooth out rough spots for the best results.
Can I Just Spray-Paint My Bike?
Spray painting is a popular choice due to its ease of application and the even coating it can provide.
When spray painting, apply the paint in several light coats rather than a single heavy one. This method helps avoid drips and runs, leading to a more even and attractive finish.
Can I Paint My Bike Myself?
Yes, painting a bike can be a fulfilling DIY project. With the right set of tools, a bit of patience, and a careful approach, you can achieve great results.
The key is to follow the steps methodically and not rush the process, ensuring each layer of paint and clear coat is properly applied and dried.
Is Acrylic Paint Good for Bikes?
Acrylic paint can be used, but it is generally less durable than paints specifically formulated for metal surfaces, like automotive paints.
If you’re looking for a finish that lasts longer and resists the wear and tear of regular use, it’s better to opt for paint that’s designed for use on metal. Acrylic might be suitable for decorative touches but isn’t recommended as the primary paint for a bike.
Conclusion
Painting a bike without taking it apart is an achievable and satisfying project. It allows you to refresh the look of your bike with less effort and technical skill than a full disassembly would require.
By following the steps outlined in this guide, you can ensure a successful paint job that revitalizes your bike’s appearance while maintaining its structural integrity. This article has explored how to paint a bike without taking it apart.
Remember to take precautions, use the right tools, and apply patience throughout the process. With a bit of creativity and effort, your bike will not only function well but also reflect your style.