How to Hook up A Light on A Motorized Bicycle
Introduction
Motorized bicycles, a unique fusion of pedal power and motor assistance, provide riders with the ability to travel longer distances at increased speeds. These bicycles are especially beneficial for those who wish to commute or travel without relying solely on physical exertion. This article will explore how to hook up a light on a motorized bicycle.

To ensure safety and practicality, especially during night rides or in dim lighting, it is essential to equip these bicycles with adequate lighting systems. Proper lighting not only enhances visibility but also ensures that riders are seen by others, reducing the risk of accidents.
Why You Need to Hook Up A Light on A Motorized Bicycle
Attaching a light to a motorized bicycle is essential for several reasons, primarily focusing on visibility and safety. When riding, especially during early mornings, evenings, or in poorly lit areas, it’s crucial for the rider to see the road clearly. This helps in avoiding potential hazards like potholes, uneven surfaces, and obstacles.
Lights play a significant role in these situations by illuminating the path ahead, allowing for a safer and more confident ride. Equally important is the aspect of being visible to others. Motorized bicycles, due to their compact size, can sometimes be overlooked by drivers of larger vehicles.
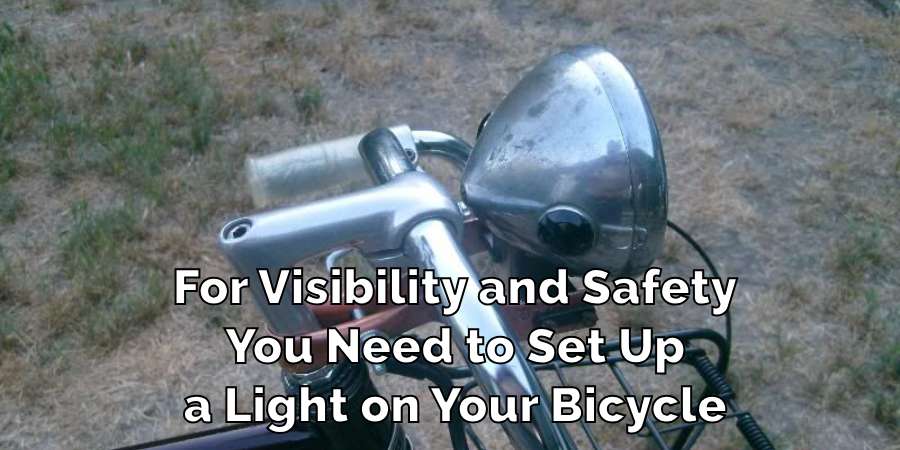
By having a bright light on the bicycle, it becomes much more noticeable to car drivers, pedestrians, and other cyclists. This visibility is vital in preventing collisions, particularly at intersections or when navigating through traffic.
Moreover, in certain areas, having lights on bicycles is not just a safety measure but also a legal requirement. Many regions have laws mandating the use of lights after dark for all bicycles, including motorized ones. This regulation underscores the importance of lights in ensuring a safe riding environment for everyone on the road.
In summary, fitting a light on a motorized bicycle is a simple yet effective way to enhance safety. It ensures the rider’s path is well-lit, increases their visibility to others, and complies with traffic laws where applicable, collectively contributing to a safer and more enjoyable riding experience.
Tools Needed to Hook Up A Light on A Motorized Bicycle
When setting up a light on a motorized bicycle, having the right tools at hand makes the process smooth and efficient. This simple task can greatly improve your safety and visibility during rides. Here are the essential tools you’ll need:
- Screwdrivers: These are necessary for attaching the light and its bracket to your bicycle. A set with various sizes ensures you have the right fit for different screws.
- Wire Strippers: These come in handy if you need to adjust the length of the wires or connect them securely. They allow for precise stripping of wire insulation without damaging the wire itself.
- Electrical Tape: This is used to insulate wire connections, ensuring they are safe and protected from elements like water and dust.
- Light Mounting Brackets: These brackets hold the light in place on your bicycle. They come in different sizes and styles, so it’s important to choose one that fits your light and bicycle frame.
- Battery or Dynamo: The choice between a battery or a dynamo depends on the type of light you have. A battery is a more common choice for its ease of use and installation, while a dynamo, powered by your pedaling, is an eco-friendly option.
Equipping your motorized bicycle with a light is a straightforward task when you have these tools. They help in securely installing the light, ensuring it functions well and stays in place during your rides, ultimately enhancing your safety on the road.
How to Hook Up A Light on A Motorized Bicycle
Hooking up a light on a motorized bicycle is a practical and necessary step to ensure your safety while riding. Here’s a detailed guide to help you through the process:
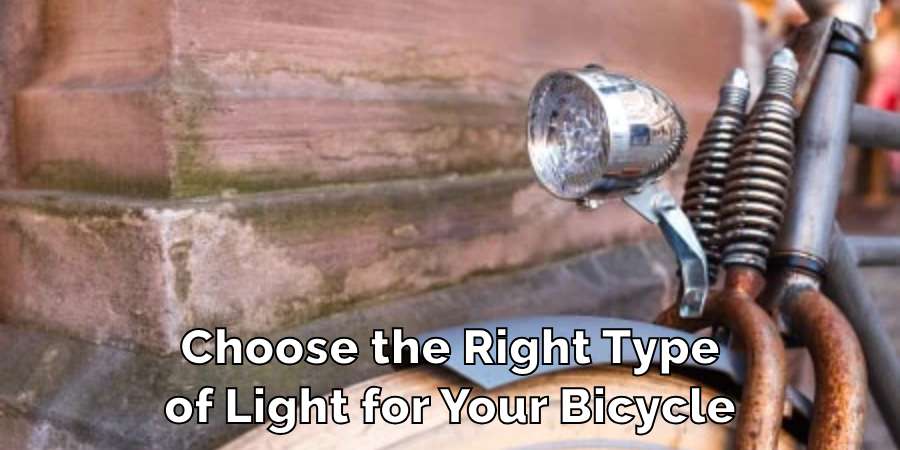
Selecting the Light
The first step is choosing the right type of light for your bicycle. There are mainly two types: battery-operated and dynamo-powered. Battery-operated lights are popular due to their ease of installation and use.
They usually come with rechargeable batteries and are straightforward to attach and remove. Dynamo-powered lights, on the other hand, are powered by your bicycle’s motion, making them eco-friendly. They require a bit more effort to install but are efficient in the long run as they don’t need battery replacements.
Positioning the Light
The most common place to mount your light is on the handlebar or the front frame of the bicycle. This position ensures the light illuminates the path directly in front of you. The mounting process typically involves attaching a bracket to the bicycle and then fixing the light onto the bracket.

Make sure the light is positioned so it points straight ahead, allowing you to see the road clearly and making you visible to others.
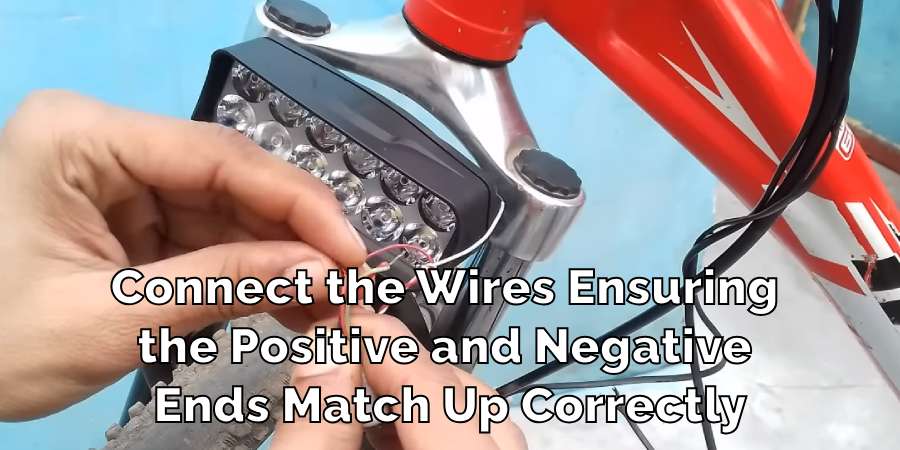
Wiring
For dynamo lights, you’ll need to connect the wires from the dynamo to the light. This can be a bit tricky but is manageable with some patience. Use wire strippers to strip the ends of the wires for a clean connection.
Connect the wires ensuring the positive and negative ends match up correctly. For battery-operated lights, this step is usually not required as they come with their own power source.
Securing the Setup
After wiring, it’s important to make sure that all wires are securely in place and not dangling loosely. Use electrical tape to wrap around any loose wires or connections. This not only keeps the wiring neat but also protects it from wear and tear, and the elements like rain or dust.
Testing
The final step is to test your light. Turn it on in various lighting conditions, from bright daylight to complete darkness, to ensure it works properly. Check the brightness and direction of the light, making sure it sufficiently illuminates your path and makes you visible to others.
Also, test while riding to ensure that the light stays in place and the connections don’t come loose.
Setting up a light on your motorized bicycle is an important safety measure. By following these steps, you can ensure that your light is properly installed, providing you with visibility during your rides. Remember, a well-lit bicycle not only helps you see where you’re going but also makes sure others can see you, reducing the risk of accidents.
Precaution While Hooking Up A Light on A Motorized Bicycle
When setting up a light on your motorized bicycle, it’s important to follow certain safety steps to ensure a successful and safe installation. Here are some key points to consider:
Disconnect the Power Source
Before you start any work, always make sure to disconnect the power source. This is especially important for electric bicycles to prevent any risk of electric shock or damage to the bicycle’s electrical system. If your light is battery-operated, take out the battery before beginning the installation.
Insulate Wires Properly
To prevent any short circuits, it’s essential to ensure all wires are correctly insulated. If you’re handling the wiring yourself, use wire strippers for a neat job and cover any exposed wire connections with electrical tape. This not only avoids short circuits but also protects the wires from damage due to exposure to water, dirt, or physical wear and tear.
Regular Checks
Once the light is installed, regularly check that it’s securely mounted and functioning as expected. Make sure the light remains stable and doesn’t come loose over time, particularly when riding on rough terrain. Also, keep an eye on the light’s performance – it should consistently provide a strong, clear beam to light your way.
Be Careful with Wiring Layout
Arrange the wires so that they don’t interfere with any moving parts of the bicycle, like the wheels or chain. Improperly placed wires can get caught up during a ride, posing a safety hazard.
Avoid Electrical Overload
If you are using other electronic devices on your bicycle, be cautious not to overload the bicycle’s electrical system, particularly if you have an electric bicycle. Overloading can cause malfunctions or damage the bicycle’s battery and motor.
By following these precautions, you can safely install a light on your motorized bicycle, enhancing your visibility and safety during rides. Regular maintenance and careful installation will keep the light in optimal working condition.
FAQ’s
How Do You Attach Bicycle Lights to a Bicycle?
Attaching lights to a bicycle is a simple process, usually requiring no special tools. Most bicycle lights come with mounting brackets designed to clamp easily onto the handlebars or the frame of the bicycle.
To attach the light, first position the bracket where you want the light to be – typically on the handlebars for front lights or on the seat post for rear lights. Then, secure the bracket tightly using screws or a clamp mechanism provided with the light.
Once the bracket is in place, the light itself can be attached to the bracket, often sliding in or clicking into place. It’s important to make sure the light is secure and facing the correct direction for optimal visibility.
What Powers a Bicycle Light?
Bicycle lights can be powered in different ways, with the most common being batteries or dynamos. Battery-powered lights are very popular because they are easy to install and use. These lights often come with rechargeable batteries, making them cost-effective and environmentally friendly.
On the other hand, dynamo-powered lights generate power from the bicycle’s movement. They are integrated into the bicycle’s wheel hub or attached to the tire and generate electricity as you pedal, which means they don’t require battery changes.
While they can be a bit harder to install, dynamo lights are a great choice for long-distance cyclists or those looking to reduce their environmental impact.
How Do Automatic Bicycle Lights Work?
Automatic bicycle lights are designed for convenience and enhanced safety. These lights are equipped with sensors that detect the level of ambient light in the environment. When it gets dark or when you enter a dimly lit area, like a tunnel, the sensor activates the light automatically.
Similarly, when the surrounding light is bright enough, the sensor turns the light off to save power. This feature is particularly useful as it means you don’t have to remember to turn your lights on and off manually.
Automatic lights ensure that you are always visible to others when it’s necessary, enhancing your safety on the road, especially during dusk, dawn, or in changing weather conditions.
Which Device is Used on Bicycle for Lighting Purposes?
For lighting purposes on bicycles, several devices are commonly used, including LED lights, halogen bulbs, and dynamo systems. LED lights are the most preferred choice because of their high efficiency, bright light, and long-lasting performance.
They consume less power and can run longer on batteries compared to other types. Halogen bulbs, while older in technology, are also used but they are less energy-efficient and don’t provide as much brightness as LEDs.
Dynamos, which generate power from the bicycle’s motion, can power both LED and halogen lights. They are a good option for those who ride frequently and prefer an eco-friendly solution that doesn’t rely on batteries.
Do Bicycle Lights Need Batteries?
Most modern bicycle lights, particularly LED types, require batteries to function. These batteries can be either replaceable or rechargeable, with rechargeable versions being more common due to their convenience and cost-effectiveness.
Some bicycle lights, especially those designed for long rides or touring, are powered by dynamos. A dynamo is a small generator that produces electricity as you pedal, eliminating the need for batteries.
While dynamo-powered lights are less common than battery-powered ones, they are a great option for cyclists who want a sustainable, battery-free lighting solution and don’t mind the initial setup and slightly increased pedaling resistance that comes with installing a dynamo system.
Conclusion
Learning how to hook up a light on your motorized bicycle is a practical skill that greatly enhances your safety while riding. By following the steps outlined above, you can ensure that your bicycle is equipped with proper lighting, improving visibility and reducing the risk of accidents.
Always remember that a well-maintained light is crucial for safe night riding or when visibility is limited due to weather conditions. Regularly inspect and maintain your bicycle’s lighting system to ensure it functions optimally and keeps you safe on your journeys. This article has explored how to hook up a light on a motorized bicycle.